Level 6: Flooded Temple
Tile: 5F. Order: Past, Future, Present
Items: Mirror Shield, Flippers, Bombs+
Level 6-1: Past
Item: Mirror Shield
Boss: Fire Gleeok (1 head)

This is the frozen dungeon, so you can expect some ice to slow you down (v2.10 doesn't have real ice so it's just a slow tile). We'll skip a few rooms too.
Go north, west and north (north and west if you hate block puzzles), bomb west and collect the map, and then bomb west and collect a key.
Go back east through the two bombed walls, and back south. Go west and go into the passageway.
Go south and west. Get the key here and go back east and north.
Now go east, south, and south again. A pushblock hides the heart container piece.
Go east, through a block puzzle and east again. Get a key, then bomb up and get the last key.
Get back to the entrance. West, west, north, west, passageway, east east south.
Go through the locked door to the east. Follow this path to the boss. Kill the boss, get the heart container piece, and go north to get the mirror shield (which lets you enter the swamp).
Level 6-2: Future
Item: Flippers
Boss: Mirror Wizzrobe x3
This dungeon is longer than the text makes it seem. But, the magic key skips so much of this dungeon, there's a separate walkthrough.
Start by going north three times and then east to get a key. Go back west and south once. Go west twice, and bomb south. Get the map and push a block for the heart container piece.
Go back north through the bombed wall, and take the west path that leads to a passageway, which you go into of course.
Go west, north, west, and north. Get the compass, and bomb west. Get the key.
Now get back to the dungeon entrance. East south east south east, passageway, east south east east east south south.
Go east, east, and north to get a key. Go back south and west, and go south through the locked door.
Go east and south, and then go through the passageway.
Go south three times and collect the key. Go back north twice, and through the locked door to the east.
Keep going down this path, and it leads to the boss. Kill it for the heart container piece and go west to get the flippers.
Magic Key Walkthrough:
Start by going north, west, and west. Get the map, and then push a block for the heart container piece.
Go back to the entrance west west south. Go west, south, west, south and through the passageway.
Go south, east, and follow this path to the boss. Kill it for the heart container piece and go west to get the flippers.
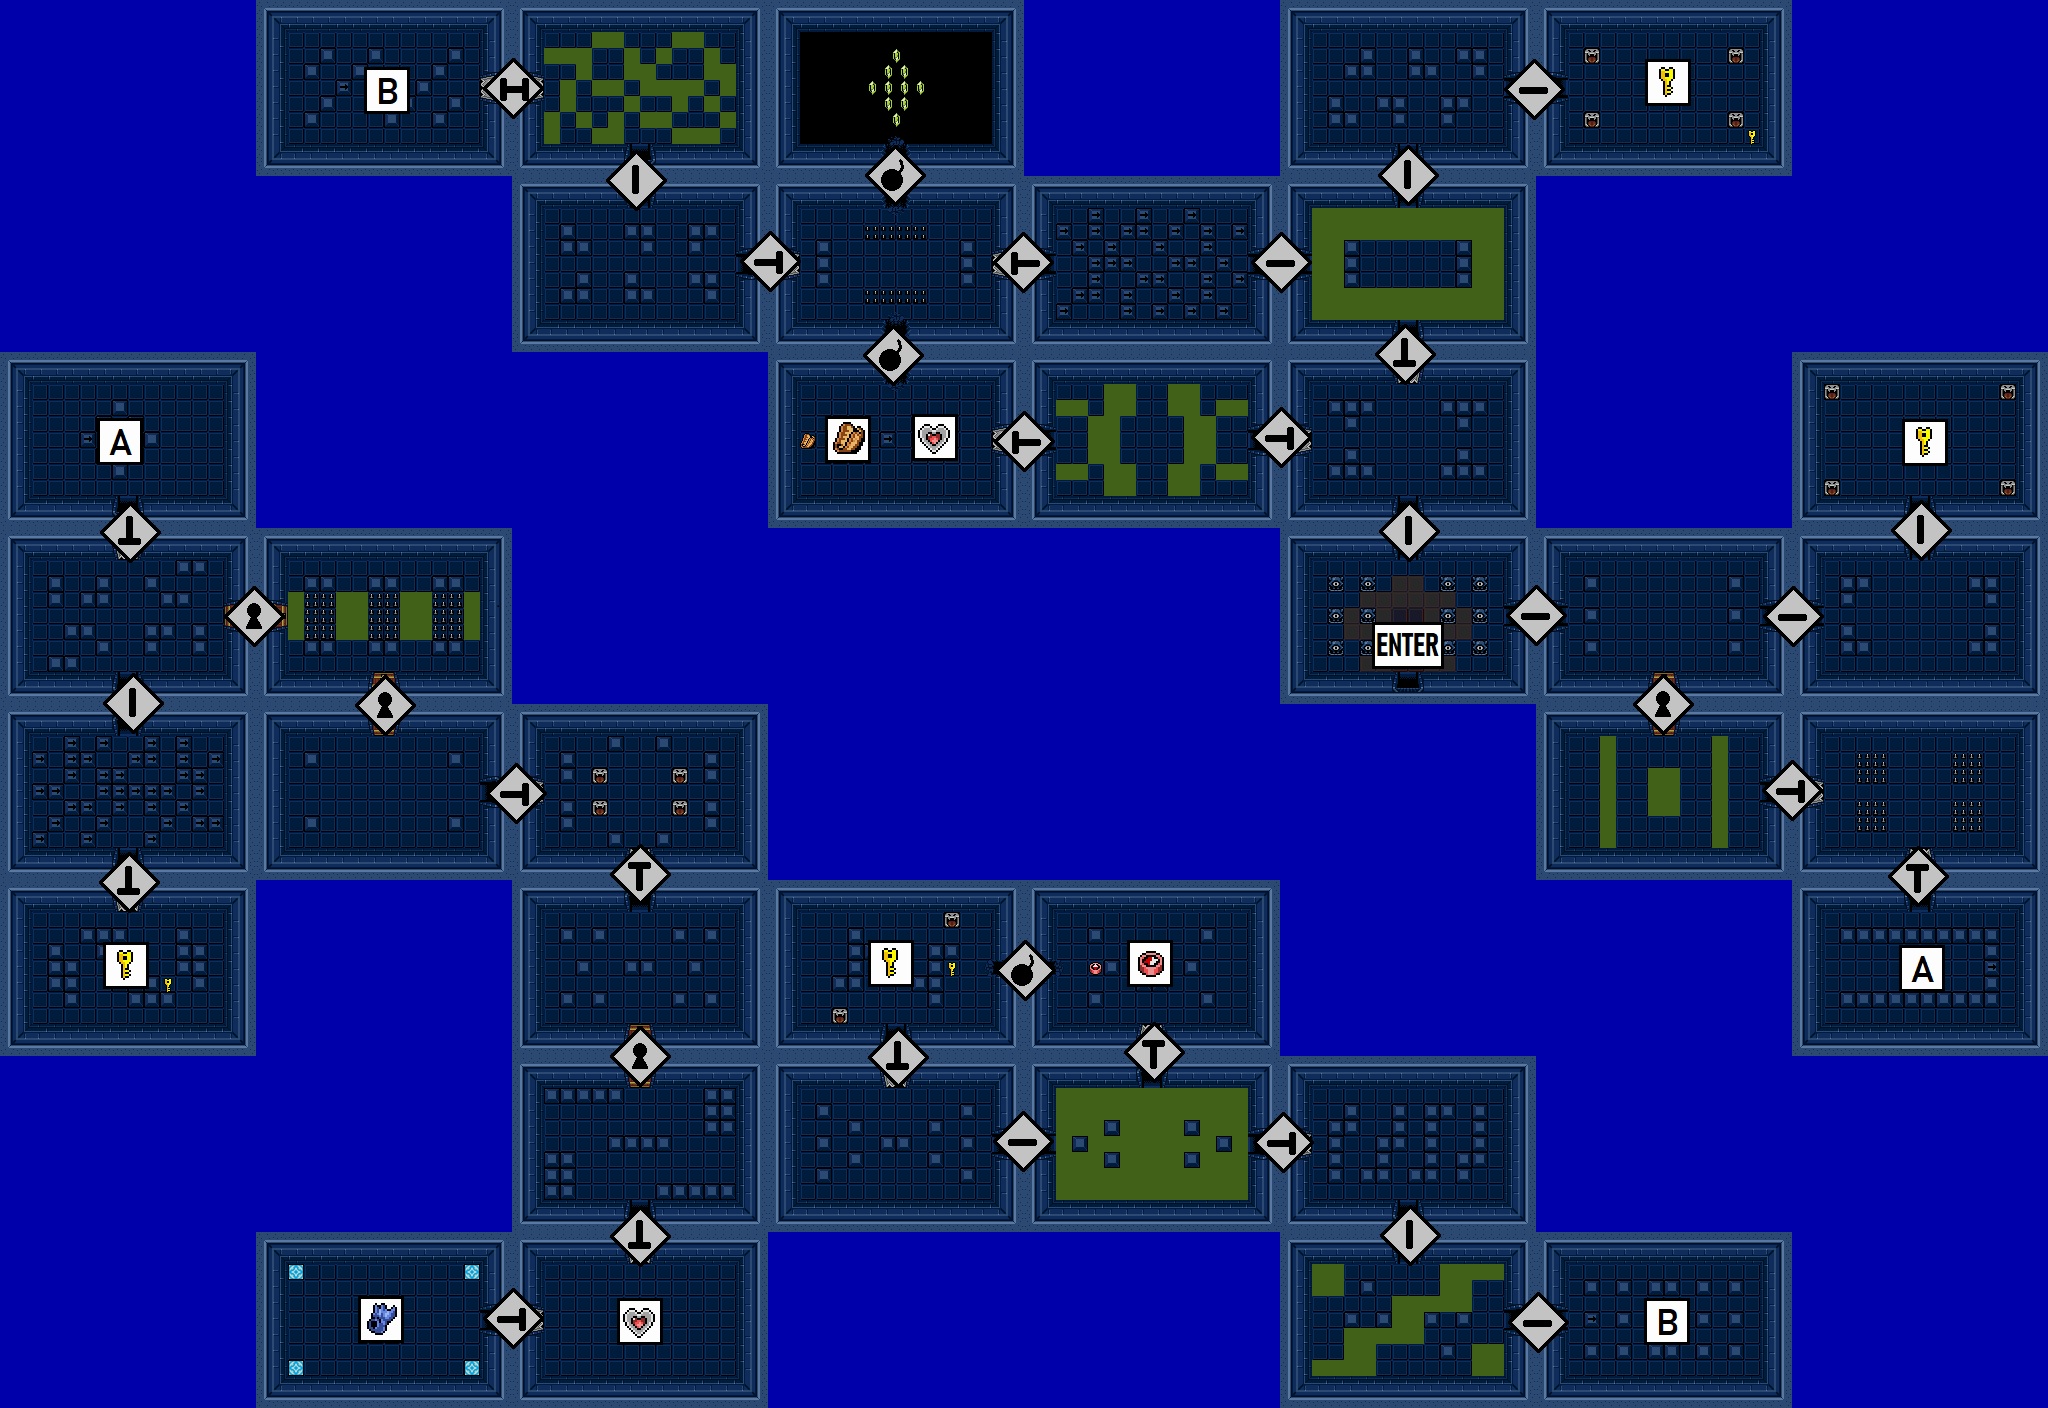
Level 6-3: Present
Item: Tear, Bombs+
Boss: Patra L3

Now the level earns its title. You'll soon see inaccessible items and doors. You really will be flooding the dungeon.
The level is split into two halves connected by passageways. You have to raise the water level in one half, and then raise the water level in the other half in order to reach the boss.
Start out going east twice, and then south twice, to get a key. Go back to the entrance.
Go north through the locked door and then north and east to get a key. Then back south and west.
Go west through the low door. If you have the hookshot, you can get this map. Keep going down this path.
You'll get to a branch and a key you can't get to yet. Go north and west to get a key, and then back east and south.
Take the west branch and into the passageway leading to the second half of the dungeon.
Go west and follow the path (past another key you can't reach) to the branch.
Go south and west to get the compass, although you already heard the boss. Go north, ignore the block puzzle and go west.
Go north to get a key, then go south and south through the locked door. Go west through the low door to find the first switch. Step on it to raise the water in the first half.
Now make your way back to the start of the dungeon. If you choose to end and continue, you'll need to get a key and magic container northwest of the entrance.
Go back to the passageway. East, north, east, east, east, south, and east. Go into the passageway to the first half. You'll see the low doors are now inaccessible.
Go north and east. From here you can choose to go south to get the map, but it's a dead end so you'll have to come back here.
Go east through a door you couldn't reach before. Go south, then west to quickly get a key, then east twice and north, and you'll see the pushblock to get a magic container.
Go east one, and then south twice to the dungeon entrance. Go east and south, and a pushblock will let you carry more bombs.
Go north then east, get the key, and then go north again for the second switch. Now the other half of the dungeon is flooded.
Go south, west, west (to the entrance), and then north three times, then east. Take the passageway to the other half of the level.
Go east through a locked door, then north through a locked door, and then north one more time to where the path branches.
Take the east branch, and then skip the block puzzle and go east again. This path leads to a dead end with a key.
Go back to the block puzzle room, and skip it again and go west. Go north and then west through the locked door. Go north and then west again.
So south twice to get a key. Then go back north, and then north through the locked door, and you'll finally get the boss key.
Get back to that block puzzle we kept skipping. Go south, east, south, east, south, and east, and you'll be there.
Finally, you have to solve this block puzzle. So south twice, then east through the boss key door, and east again to the boss room. Kill the boss, collect the heart container, and go east to get the last tear.
Main Page Map Legend Overworld Dungeons Rules Story Items and Enemies PureZC